2011
In Business since

750+
Project completed

$18.6+M
Revenue generated for our clients

100%
Outstanding Customer Service
2011
In Business since
750+
Project completed
$18.6+M
Revenue generated for our clients
100%
Outstanding Customer Service
Trusted by hundreds companies


Fully Managed Local SEO Services
No matter what marketing goals you have for your compan...
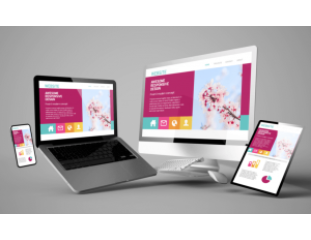
Starter Website Design
Responsive websites with UX design & conversion at ...

Lead Generation – Pay Per Lead
Lead Generation without the risk you only pay for the q...

Premium Website Design
Responsive websites with UX design & conversion at ...

Fully Managed National SEO Services
No matter what marketing goals you have for your compan...
Fully Managed PPC Agency Services
You can relax knowing we are working on your Google Ads...
233% Increase In Revenue, 1100% Increase in Organic Traffic and 76% Decrease In cost per click.
- Time4Diamonds
12X Better Website & 138% Increase In Conversation Rate
- 1BoxOffice
264% Increase In Organic Traffic and 31% Decrease In Cost Per Registration.
- ADC College
21% Increase In Revenue, 370% Increase in Organic Traffic and 75% Less Time on Client Management With The CRM.
- Watch Repair Piccadilly
129% Increase in leads and 84% Increase in Organic Traffic.
- BHD Solicitors
Latest Reviews
 5
5 Business Relauncher helped us build a strong digital presence . Our Google PPC Campaign reached 40.2+M Impressions in 12months. Our SEO also grew significantly since we started working with Business Relauncher.
Robert Kella, Marketing Manger-Time4diamonds
5 Working with Business Relauncher has been extremely stunning in terms of results. We’ve seen significant increase in table bookings and our monthly telephone orders grow over 300% so far.
Mohamed Naeem - Owner, Mazar Restaurant.
5 Business Relauncher helped us develop, promote and drive traffic to our website. I have no hesitation in recommending Business Relauncher to you as a business partner.
Giovanni Caloia - Managing Director, ADC College
5 3 months after we started working with BR our revenue grew by 21% and our call inquiries grew by 95.1%. We recently added 2 more people in the team to keep up with the growth..
Joel Santos - General Manager, Watch Repair Piccadilly
5 They have paid for themselves. Very few agencies actually deliver, Business Relauncher is one of those that deliver and are 100% the real deal.
Alpha Barry- Digital Marketing Manager - IBWatches
DRIVING DIGITAL REVENUE FOR OUR 350+ SATISFIED CUSTOMERS